
Getting the hang of putting in and taking out scleral lenses is a game-changer. It can take what feels like a clumsy, frustrating chore and turn it into a quick, easy part of your morning and night. These aren't your typical soft contacts; they require a special touch to create that perfect, fluid-filled space over your cornea that delivers incredible comfort and vision.
Why Getting Scleral Lens Handling Right Is a Big Deal
Scleral lenses are a fantastic technology for people with tricky vision problems, but their unique design calls for a totally different handling method. They don't just sit on your cornea—they vault over it, creating a protective, liquid-filled barrier. This is the secret to their success, but it also means that nailing the insertion and removal process is absolutely essential.
It's completely normal for new wearers to feel a little intimidated. I've seen it countless times. You worry about trapping an air bubble, poking your eye, or getting the lens "stuck." The good news is that once you master the right technique, all those fears melt away. A smooth, confident application means the lens settles exactly where it should, giving you that crisp, stable vision scleral lenses are famous for.
Scleral Lenses Are a Different Beast
Picture a soft contact lens as a flimsy piece of plastic wrap that just drapes over the eye. A scleral lens, on the other hand, is like a tiny, custom-made bowl. It has to be filled to the brim with preservative-free saline before it ever touches your eye. If you're curious about what goes into different types of lens solutions, our guide on what contact solution is made of breaks it all down.
That saline-filled bowl is what makes all the difference for your corneal health and comfort. But it also means you can't just slide it in. The whole goal is to carefully place this saline-filled lens onto your eye without spilling a drop or trapping any air underneath.
The real-world difference between a sloppy attempt and a perfect application is night and day. One leads to foggy vision and irritation, while the other provides amazing comfort and clarity that can last all day long.
Building Confidence Through Practice and Proper Technique
For the 74% of patients who depend on these lenses for conditions like keratoconus, mastering the handling is non-negotiable. Studies comparing different methods have actually shown that using tools, like insertion and removal plungers, often leads to fewer problems like misplaced lenses or pesky air bubbles. You can see the clinical data for yourself in this scleral lens research summary.
Ultimately, getting good at this isn't just about avoiding frustration—it's about unlocking the full, life-changing benefits these lenses offer. Given how specialized this skill is, it's worth noting how training can be improved. For instance, creators in the medical education space are exploring top AI tools for better healthcare training to build more effective learning modules.
By taking the time to learn the proper steps, you’ll build muscle memory. Before you know it, the whole process will become second nature—quick, simple, and completely stress-free.
Your Practical Guide to Flawless Scleral Lens Insertion
Getting your scleral lenses in might seem intimidating at first, but I promise it gets easier. With a little practice, what feels awkward today will become a quick, natural part of your morning routine tomorrow. The key to success is setting yourself up properly before the lens even gets near your eye.
First, create your personal "scleral lens station." All you need is a clean, flat surface (like a bathroom counter), a mirror laid flat, your preservative-free saline, and your insertion tool. I highly recommend placing a lint-free towel down first; it’s a simple trick that can save a lens from a nasty fall or from picking up debris.
The 3 Golden Rules of Prep
Before you do anything else, you have to get your hands clean. This isn't just a suggestion—it's non-negotiable for eye health.
- Wash Your Hands: Use a simple, non-oily soap and scrub thoroughly for at least 20 seconds. Then, dry your hands completely with a lint-free towel. You'd be surprised how easily a tiny piece of lint can get on your lens and cause major irritation all day.
- Inspect the Lens: Carefully take one lens out of its case. Hold it up to the light and give it a good look. You’re checking for any tiny chips, cracks, or protein buildup. If anything looks off, don't risk it. Set that lens aside and give your eye doctor a call.
- Fill It to the Brim: This is probably the most critical step for clear, comfortable vision. Take your single-use vial of preservative-free saline and fill the bowl of the lens all the way to the top. I mean all the way—so full that the saline creates a slight bubble over the edge.

These three steps—wash, inspect, and fill—are the foundation. Do them every single time.
A Tip from the Trenches: If your eyes are especially dry, ask your doctor about adding a drop or two of a thick, preservative-free artificial tear into the saline bowl. It can create an extra-cushioned, more comfortable feel when you put the lens in. Just make sure you get the green light on the specific brand you plan to use.
Nailing the Insertion Technique
With your perfectly prepped lens sitting on its applicator, it’s time for the main event. Your mission is to get that lens onto your eye without spilling the saline or, worse, trapping an air bubble.
The secret is your posture. Don't face the mirror straight on. Instead, lay the mirror flat on your counter, tuck your chin to your chest, and look straight down into it. This position makes your eye a flat, parallel target and lets gravity work with you, not against you.
Next, you have to get your eyelids out of the way. Your blink reflex is strong, so you need to be firm.
- Top Lid: Use the middle finger of your non-dominant hand (the one not holding the lens) and reach over your brow. Pull your upper eyelid straight up, pinning it against the bone. Make sure you get all of your eyelashes.
- Bottom Lid: With a finger on your dominant hand (the one holding the applicator), pull your lower lid straight down. The goal here is to create the widest opening you possibly can.
The Final Approach
Okay, eyelids are wide, your head is in position—time to move in.
Bring the saline-filled lens straight up toward your eye. Go slow and steady. There’s no rush. As you get close, you’ll feel the cool saline touch your eye first. That’s a good sign! Keep moving forward with gentle pressure until you feel the lens itself make contact.
Now, give the applicator a little squeeze to release the lens onto your eye.
Once it's on, gently let go of your lower eyelid first, then your upper lid. Blink a couple of times to help it settle. If all went well, you'll have perfectly clear and comfortable vision.
What if your vision is blurry or feels a bit "sloshy"? You've trapped an air bubble. Don't panic; it happens to everyone, even veterans. The only fix is to take it out, rinse it, refill it with fresh saline, and try again. Perfecting this process takes time, but every attempt builds the muscle memory you need to do it flawlessly every day.
Taking Your Scleral Lenses Out: The Gentle Removal Process
You’ve enjoyed a full day of clear, comfortable vision. Now, it’s time for that final step in your daily routine: safely removing your scleral lenses. Getting this part of the scleral lens insertion and removal process right is just as crucial as putting them in. A gentle, correct technique is your best defense for protecting your eye health and getting the most life out of your custom lenses.

Just like insertion, removal starts with clean hands. Wash them well with a soap that doesn't contain oils or moisturizers, then dry them on a lint-free towel. Have your clean lens case open and ready with fresh disinfecting solution so your lens has a safe place to go the second it comes out.
Mastering the Removal Plunger
For most scleral wearers, a small suction cup tool, often called a removal plunger, is the gold standard for safe and easy removal. But it’s not just about using the tool; it’s about the technique. If you get it wrong, you can make removal much harder than it needs to be.
The biggest mistake I see people make is aiming the plunger for the dead center of the lens. That’s what you might do with a small RGP lens, but with a scleral, it creates a powerful suction that’s tough to break and can even leave a temporary red mark on your cornea.
The real goal is to use the plunger to gently lift an edge of the lens. This is what breaks the seal and allows the lens to pop right off.
- Smart Placement: Don’t aim for the middle. Instead, place the plunger on the lower third of the lens, just below your pupil.
- The Right Motion: Once the plunger makes contact, don't pull straight out. The magic is in a gentle "lift and pull" motion. Imagine you’re peeling the lens away from your eye, starting from the bottom edge and moving up and out.
This one small adjustment in technique makes all the difference. The lens will release its seal without that uncomfortable pulling sensation, giving you a smooth, easy removal every single time.
Think of it like peeling a sticker off a piece of paper. You wouldn't just grab the middle and yank upwards. You'd lift a corner first to break the seal. That's the exact same principle for gentle scleral lens removal.
What if You're Caught Without a Tool?
It happens. You're traveling, you've misplaced your plunger, and panic starts to set in. Don't worry. There’s a manual method that uses your eyelids to do all the work. It definitely takes some practice to get the hang of, but it’s an invaluable skill to have in your back pocket.
This technique is sometimes called the "eyelid method" or "scissor method."
- Start by opening your eyes wide and looking straight into the mirror.
- With the index finger of one hand, pull the outer corner of your eye outward and slightly up. This creates tension across your eyelids.
- Now, use the index finger of your other hand to press firmly against your lower eyelid, right up against the bottom edge of the scleral lens.
- Here comes the key move: perform a forceful blink. The pressure of your eyelids squeezing together should dislodge the edge of the lens, causing it to pop out.
It’s a good idea to lean over a clean towel when you’re first learning this, just in case the lens falls. While the control of a plunger is hard to beat, knowing how to do manual scleral lens removal is a true lifesaver when you’re in a bind.
When a Lens Feels Stuck
Once in a while, a lens might feel like it’s cemented to your eye at the end of the day. This usually happens when your eyes get a bit dry, which can make the lens seal feel tighter. The absolute worst thing you can do is panic and start yanking with the plunger.
If your lens won't budge, just stop and take a deep breath. The fix is almost always simple: rehydrate your eye.
- Put a few preservative-free rewetting drops into your eye, right on top of the lens.
- Blink a few times and then gently massage your closed eyelid. This helps the moisture work its way underneath the lens.
- Give it a few minutes. Let the drops do their job.
That extra lubrication is usually all it takes to loosen the suction and break the seal. After waiting, try the removal process again with your plunger or the eyelid method. You'll likely find the lens comes out much more easily. Forcing a stuck lens is a recipe for irritation, so always remember that patience and lubrication are your best friends.
Troubleshooting Common Scleral Lens Challenges
Even when you've mastered the basics of scleral lens insertion and removal, you’re bound to hit a few bumps in the road. That’s perfectly normal, especially as you get used to handling your new lenses. Think of this as your go-to guide for turning those little frustrations into quick, easy fixes.
When you run into something unexpected, having an effective troubleshooting guide can make all the difference. Let's walk through the most common challenges and exactly what to do about them.
Dealing with the Dreaded Air Bubble
So, you’ve got the lens in, but your vision is blurry, maybe a little watery, almost like you're looking through a fishbowl. Nine times out of ten, you’ve trapped an air bubble. This is easily the most common hiccup for new wearers and happens when a pocket of air gets caught between the lens and your cornea.
An air bubble doesn't just mess with your vision; it can feel strange and uncomfortable. Don't waste your time trying to blink it out or push on the lens—it won’t work.
The only real solution for an air bubble is to take the lens out, fill it back to the brim with fresh, preservative-free saline, and pop it back in. It might feel like a pain, but it's the one and only way to get back to crisp, comfortable vision.
Solving the Mystery of Midday Fogging
This one can be maddening. Your vision is crystal clear when you start your day, but by midafternoon, a hazy film creeps in, clouding everything up. This is "midday fogging," and it’s caused by debris—tiny bits of protein and lipids from your own tear film—getting into the saline behind your lens.
This fog can be triggered by a few things, like your unique tear chemistry or even a lens fit that isn't quite perfect. While you should definitely bring up persistent fogging with your eye doctor, the immediate solution is simple.
The Fog-Busting Routine:
- Remove: Carefully take the lens out.
- Rinse: Give the lens a good rinse with your approved saline solution.
- Refill & Reinsert: Top it off with fresh saline and put it back in your eye.
Think of this "remove, rinse, and refill" process as a reset button for your vision. It's a key skill you'll use to keep your sight clear all day long.
What to Do If a Lens Won't Come Out
At the end of a long day, you might find that a lens feels stubbornly "stuck." This usually means your eyes have gotten a bit dry, which creates stronger suction between the lens and your eye. The absolute worst thing you can do is panic and start yanking with the removal tool.
The answer here is simple: hydration. Squeeze several preservative-free lubricating drops directly onto the lens while it's still in your eye. Blink a few times, then gently massage your eyelid for a minute. This helps that moisture seep under the edge of the lens and break the seal. Wait a couple of minutes, then try removing it again. It should come out much more easily. For more great advice on this topic, have a look at our article on dry eyes and contacts.
Managing Initial Discomfort or Lens Awareness
It’s completely normal to feel the lenses in your eyes for the first few days. That said, you should never feel any sharp pain or serious irritation. If you get a scratchy feeling right after putting a lens in, chances are a tiny piece of lint or dust hitched a ride. The only fix is to take it out, give it a thorough rinse, and try again.
Don't get discouraged if handling the lenses feels tricky at first. Studies show that 10.4% of scleral lens wearers stop due to discomfort or dexterity issues. And you're not alone with the fogging either; research has found that 76% of patients experience midday blurring that requires them to remove and re-apply their lenses. This stuff is common!
If you feel any discomfort that lasts beyond the first week or so, give your eye care provider a call. It could be a small fit issue that they can easily adjust to make your lenses feel perfect.
Mastering Your Scleral Lens Hygiene Routine
Getting your lenses in and out is one thing, but your long-term success with scleral lenses really comes down to a solid hygiene routine. Think of it as essential daily maintenance—it’s what protects your eyes, your vision, and the investment you've made in these incredible lenses.
Here’s everything you need to know to keep your lenses in pristine condition and your eyes healthy for the long haul.
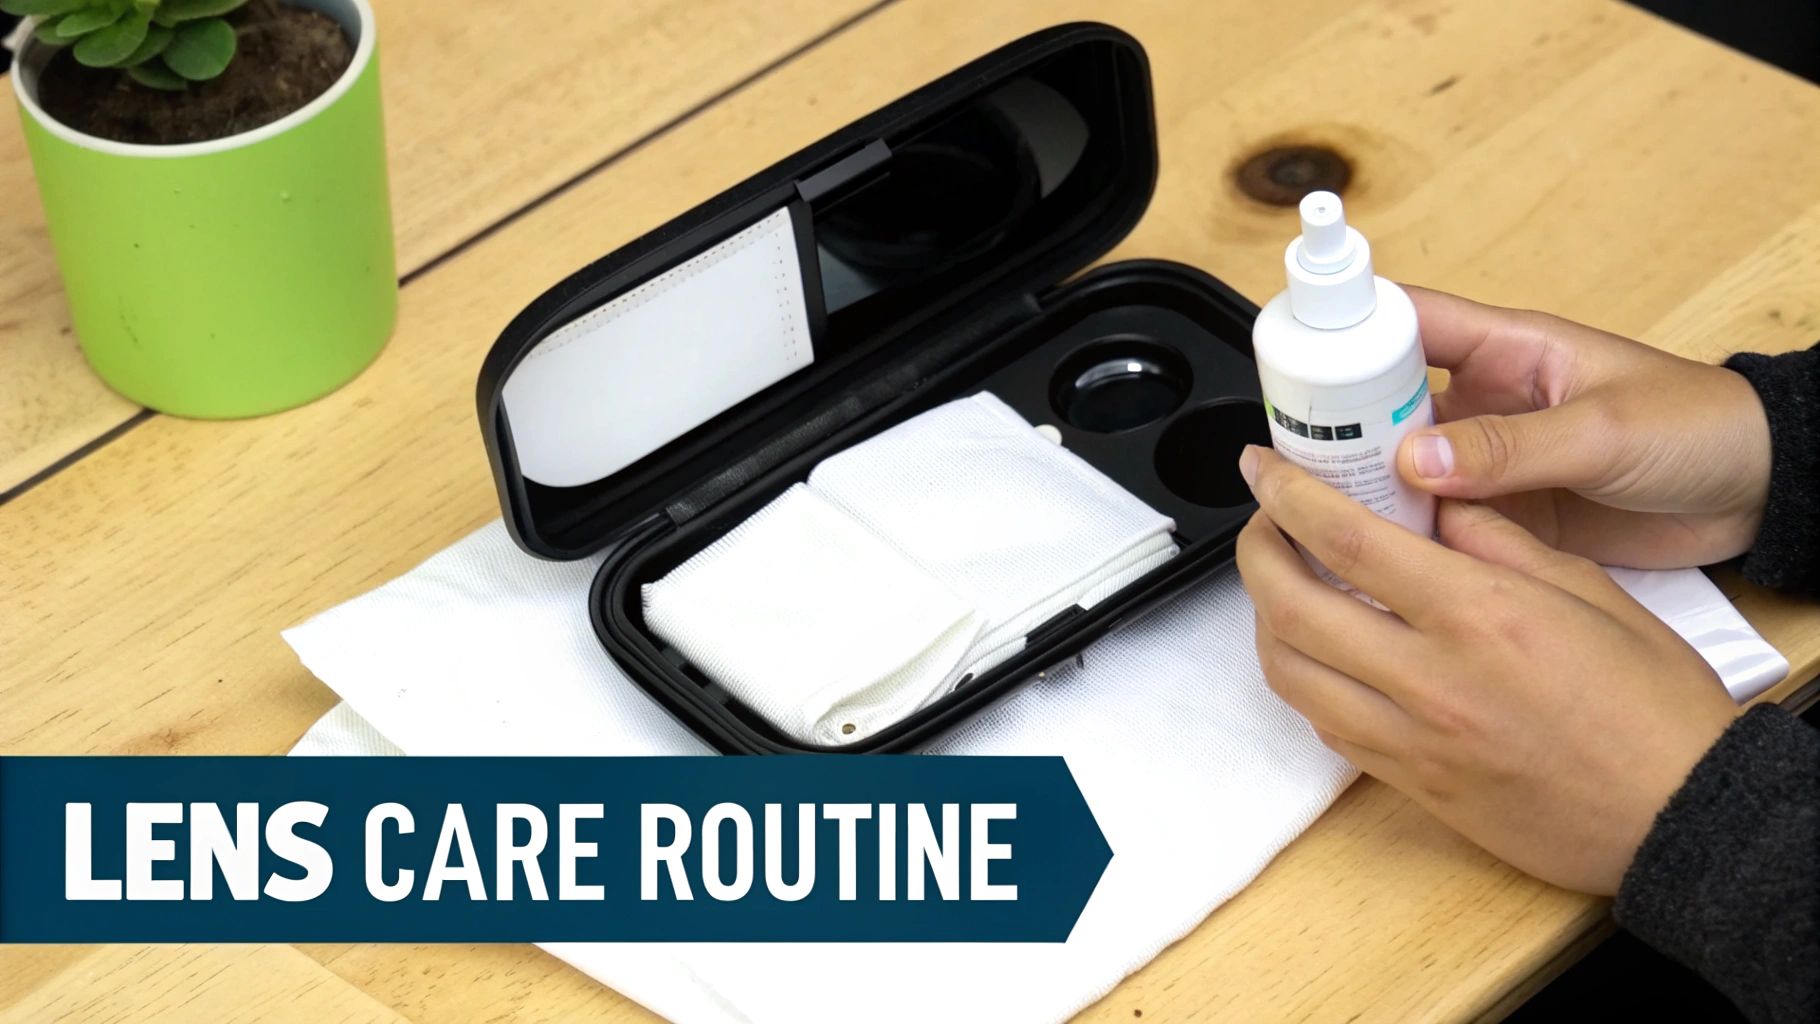
After you take your lenses out for the day, they need a good cleaning and disinfection. This isn’t just a suggestion; it's the most critical step you can take to prevent serious eye infections and ensure your lenses stay comfortable day after day.
The Core Cleaning Process After Removal
The second a lens leaves your eye, it's covered in a microscopic film of proteins, lipids, and other natural debris from your tears. If you let that sit, it can harden into a stubborn film called a biofilm, which not only clouds your vision but can become a breeding ground for nasty bacteria.
This is where the “rub and rinse” technique comes in. It’s a non-negotiable part of your daily scleral lens insertion and removal care plan.
- First, place the lens in your clean, dry palm.
- Add a few drops of your doctor-recommended daily cleaner.
- Using your fingertip, gently rub both sides of the lens for about 20 seconds. This friction is key—it physically breaks up and dislodges all that build-up.
- Finally, give it a thorough rinse with either saline or a multi-purpose solution to wash away all the loosened gunk and cleaner.
This simple act of mechanical cleaning is worlds more effective than just letting the lenses soak. For a deeper dive into these fundamentals, check out our guide on how to clean contact lenses properly.
Choosing Your Disinfection System
Once the "rub and rinse" is done, it's time to disinfect. For scleral lenses, the two most common and effective options are hydrogen peroxide-based systems and specialty multi-purpose solutions formulated for gas permeable (GP) lenses.
Hydrogen Peroxide Systems
Many eye doctors consider these the gold standard for a deep, powerful clean. They come with a special case that has a built-in neutralizing disc. You just pop the lenses in the basket, fill the case to the line, and let them soak for a minimum of six hours. The peroxide aggressively disinfects everything, while the disc slowly converts it into a gentle, harmless saline.
Crucial Warning: Never put hydrogen peroxide solution directly into your eye. It needs to be fully neutralized first, or it will cause a painful chemical burn. Always use the special case that comes with the solution and wait the full six hours.
Multi-Purpose Solutions
These all-in-one solutions are incredibly convenient for cleaning, rinsing, disinfecting, and storing your lenses. However, it's absolutely vital to make sure the one you're using is specifically approved for gas permeable scleral lenses. Not all multi-purpose solutions are built the same.
No matter which system you use, consistency is everything. Skipping steps is a common pitfall that can lead to real problems. In fact, studies on lens wearers show that poor habits are a major issue, with one report noting that 55.4% of lens-related problems were deposits or breakage and 9.6% were infections. These numbers show just how important it is to stick to your routine every single day.
Your Case Is Just as Important
Don't forget about your lens case! It’s a medical device, and it needs just as much care as your lenses.
- Daily Care: Every morning after you put your lenses in, dump the old solution, rinse the case with fresh disinfecting solution (never tap water!), and leave it open and upside down on a clean tissue to air-dry completely.
- Regular Replacement: Toss your old case and get a new one every one to three months. Over time, bacteria can form an invisible biofilm inside the case that even cleaning can't fully remove, putting your eyes at risk.
And that rule about tap water? It's absolute. Tap water contains microorganisms like Acanthamoeba, which can cause a severe, vision-threatening infection. Never use tap water to rinse your lenses or your case. This commitment to hygiene is truly the foundation of successful, comfortable, and long-term scleral lens wear.
Got Questions About Handling Your Scleral Lenses? We’ve Got Answers.
As you settle into your new routine, you're bound to run into a few tricky situations. That's completely normal. Think of mastering your scleral lens technique as a process, not a one-and-done deal. To help you feel more confident, we've compiled some straightforward, doctor-vetted answers to the questions we hear most often.
Can I Just Use My Regular Contact Solution to Fill My Sclerals?
This is a hard no, and it's probably the single most important rule to remember. You absolutely must use preservative-free, single-use vials of saline solution to fill the bowl of your lenses before putting them in.
Here's why: standard bottled solutions contain preservatives meant to disinfect lenses in a case overnight. When you fill your scleral lens with that solution, those chemicals get trapped directly against your cornea. This can lead to serious irritation, inflammation, and even long-term damage to the delicate cells on your eye's surface.
What Should I Do If I Drop a Lens?
First things first: don't panic. Find the lens and pick it up carefully to avoid scratching it. What you do next depends entirely on where it landed.
- On a clean countertop: If you just wiped the surface down, you're likely in the clear. Just pick it up, give it a very generous rinse with fresh saline, and you can probably pop it back in.
- On the floor or in the sink: This is a different story. Any surface like the floor or a sink basin is a breeding ground for bacteria. A simple rinse isn't enough. The lens needs a full cleaning and disinfection cycle using your approved multi-purpose or hydrogen peroxide system before it’s safe to wear again.
Dropping a lens on a dirty surface is a major contamination risk. Never cut corners here. Taking a few extra minutes to properly disinfect the lens is a small price to pay to avoid a nasty eye infection.
Is It Normal for My Vision to Be Blurry Right After I Put My Lenses In?
A little bit of haziness or a "swimming" sensation for the first few minutes can be perfectly normal. It's just your eye and the lens settling in together as your tear film adjusts to the new fluid reservoir.
However, if your vision is very blurry or doesn't clear up within 10-15 minutes, you've almost certainly trapped an air bubble. That bubble creates an uneven surface that distorts the light entering your eye, causing the blur. The only way to fix it is to take the lens out, empty it, refill it with fresh saline, and try again.
How Often Do I Need to Replace My Plungers?
Your insertion and removal tools won't last forever. The material they're made of can break down over time, developing tiny cracks that can harbor bacteria or simply losing their grip.
As a general guideline, plan on replacing your plungers every one to three months. Get in the habit of checking them for any wear and tear, like discoloration or stiffness. If a plunger looks cracked or the suction just doesn't feel right, toss it and grab a new one. Storing them in a clean, dry case will help them last longer.
At Contact Lens HQ, our mission is to provide you with the most reliable, doctor-backed information to make your contact lens experience a success. Explore more expert guides and reviews at https://contactlenshq.com.


